Check runs can be a pain. If you work in accounts payable, you’ll welcome any new way to expedite-the-process of printing checks easier. Crestwood to the rescue! In Acumatica, you can add a digital signature to checks before they print? Here’s how:
Adding the Signature to the Check
The first step is to create a signature file with .png format and make the background transparent using Adobe Photoshop (if you have it) or an online tool (like LunaPic).
When you have your signature file ready, go to Cash Accounts. Select the specific cash account and click on the signature tab. Select the Browse button and locate your signature file. Click upload.

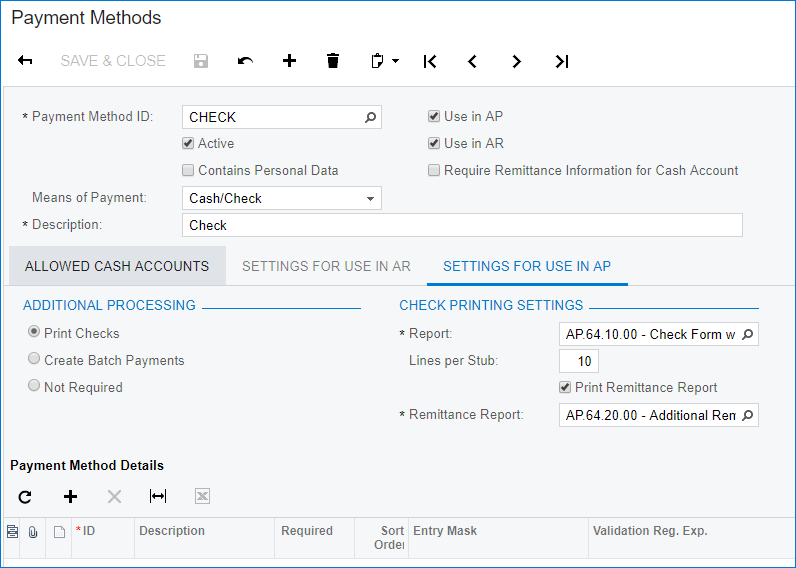
Next, open the check format in Report Designer. To find out which file is being used for your signature, go to Payment Methods, open the payment method that you are using for checks. Click the Settings for Use in AP tab. Under Check Printing Settings, in the Report field, it shows which form is being used. In my case, it is AP641000.
Open the report in Report Designer. You will need to add a picture box to your report.
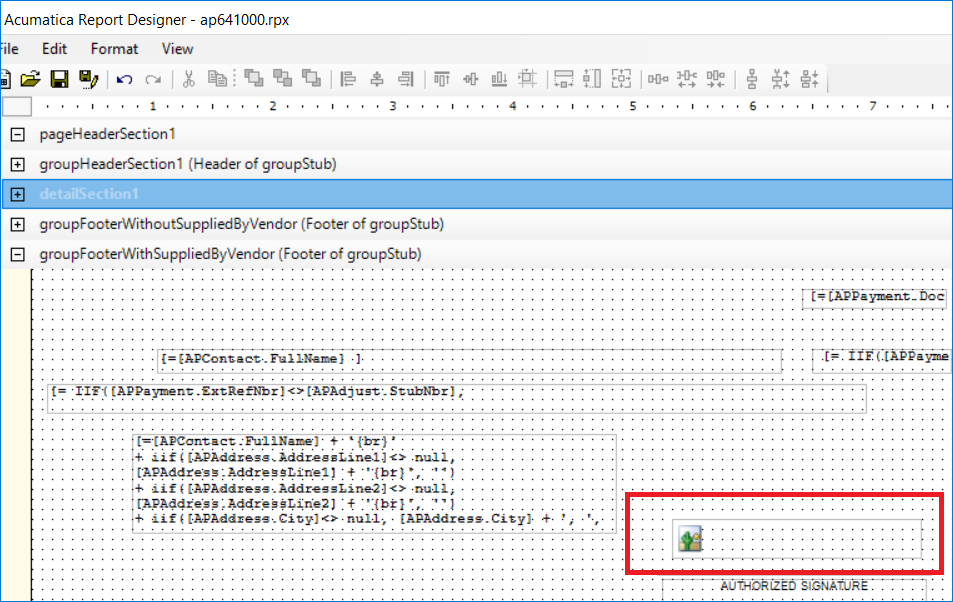
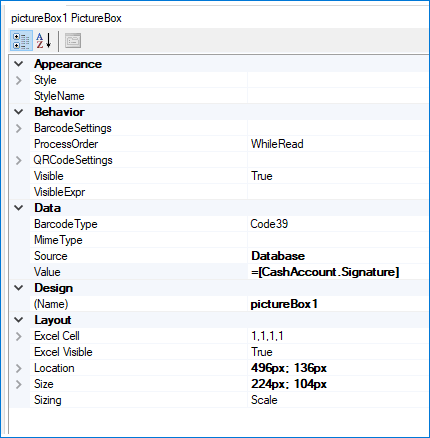
Use the following settings for your picture box:
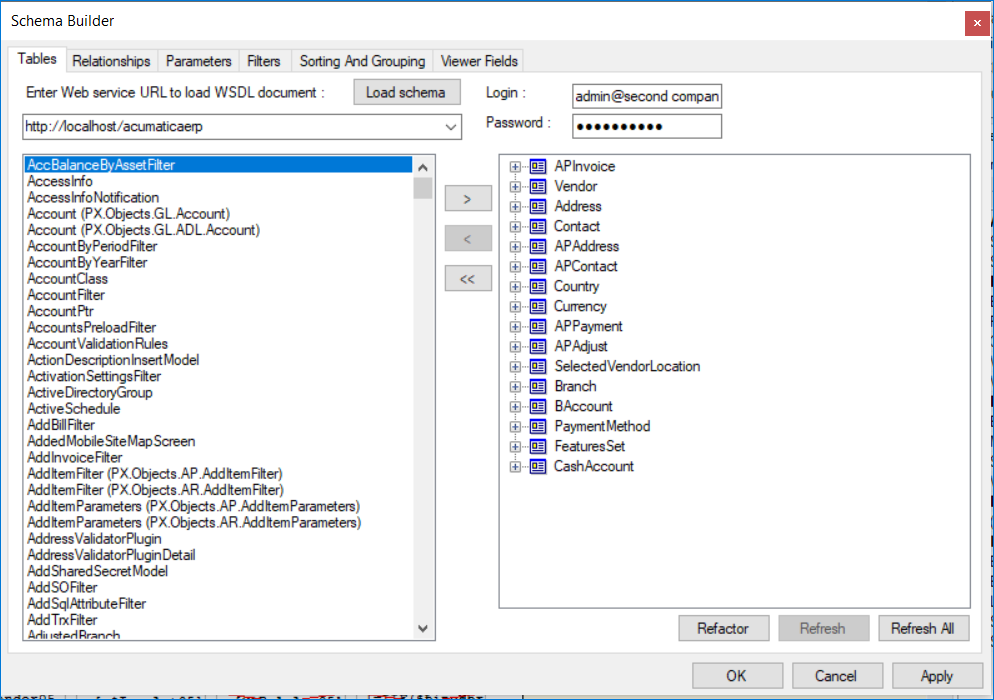
After you have added the picture box, you will need to add Cash Account to your schema. In your report, select Build Schema. Click on Load Schema, select Cash Accounts from the left pane and insert it into the right pane:
Click on the Relationships tab. You will need to add the relationship shown below.

Once the relationship has added, save your report to the server. You should be able to now print a check with a signature. Hopefully this tip will shave some time off your check run process! Be sure to subscribe to the Crestwood Associates blog for more quick tips like this!